How To Restore SharePoint
Introduction
Welcome to SoftwareONE’s BackupSimple service. This Document describes the procedure to perform a SharePoint Restore.
WHAT IS BACKED UP
You can use the SharePoint Server Agent to back up and to restore SharePoint sites on Microsoft Office 365. You can run backup operations and restore operations on a Document backup set, with options to back up and restore SharePoint sites and granular content. Even though the files reside on Office 365, backup processes and restore processes are similar to processes in SharePoint On Premise.
Supported Backups
Microsoft Office 365 with SharePoint Server supports backup of the following components:
Documents | Libraries |
Lists and List Items | Sites and sub sites |
SharePoint online site collections (created using available templates) | Microsoft Teams |
Microsoft Project Online | Permissions |
Pages | Versions |
Forms | Templates |
Settings and Views |
|
Unsupported Backup
Web parts and customizations added to the site pages.
Points to be Noted:
Document Restore Limitations:
You cannot restore individual version of a document in Office 365. If you had multiple versions of a document, and one of the versions got deleted, then you will have to restore all the versions of that document again.
If you are restoring the documents to the root, then select the root folder (/) as the destination. If you are restoring to a subsite, then select a subsite folder as the destination.
You cannot rename the files during a restore operation.
You cannot restore a document to an existing library. Library is created at the destination during the restore operation.
O365 Site Collections Restore:
Pre-requisites:
For an in-place restore operation, manually create the destination top-level site with the same name and the same template.
For an out-of-place restore operation, manually create the destination top-level site with a different name and the same template.
Limitations:
You cannot restore page customizations (web parts).
During a restore operation of multiple related sites, the top-most selected site in the source hierarchy is restored to the destination site. The rest subsites are restored in the same hierarchical order as it was in the source site.
Any missing subsites are created automatically under the destination top-level site during the restore operation.
If you are restoring the sites to the root, then select the root folder (/) as the destination. If you are restoring to a subsite, then select a subsite folder as the destination.
For an Office 365 subsite out-of-place restore operation, manually create the subsite with the same template at the destination site. If you select the root folder (/) or any other subsite, the existing subsite is overwritten.
Procedure
SharePoint Restore: This Document describes the procedure to perform SharePoint Restore. Find below the detailed step by step process to execute the restore.
Step 1 – Log into the BackupSimple Portal at https://backupsimple.softwareone.cloud
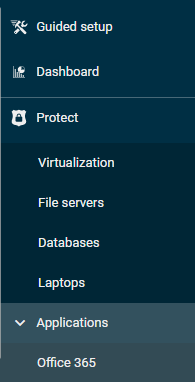
Step 2 – From the Command Centre Console navigation pane expand Protect ->Applications -> Office365
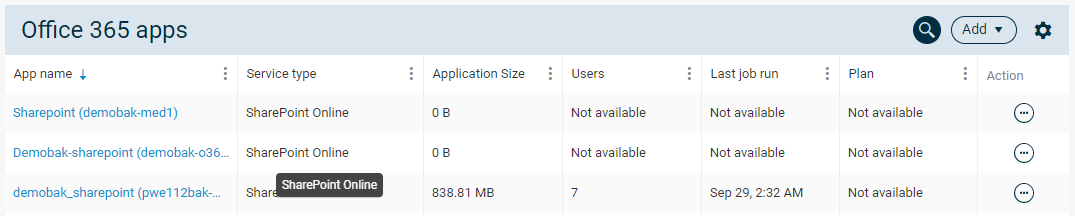
Step 3 – This will display the SharePoint Server list. Click on the listed App name to see the backup contents. In this example we will be restoring the contents backed up under Demobak-sharepoint. Click on it.
Step 4 – Select on the listed subclinet and click on the Restore, it will display the backup contents of the subclient selected.

Step 5 – In the next step select the date from which the data needs to be restored from the highlighted drop down menu:
Show Latest Backup: Will show the latest backup available for all the folders/file present from First Backup to Last backup.
Show Backup as of a specific date: Will show the Restore Point available for the selected Date and Time
Show Backup for a date range: Will show the Restore Points available for the selected Date Range

Note: In this Example we will recover the data from the latest backup.
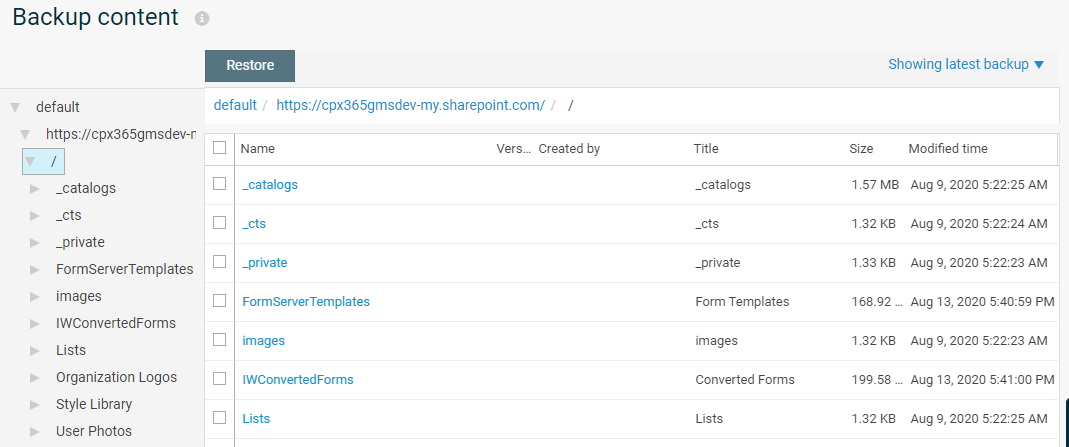
Step-6 Click on the site name to see the contents list. Select the file/folders need to be restored from the SharePoint sites and click on Restore on the top.
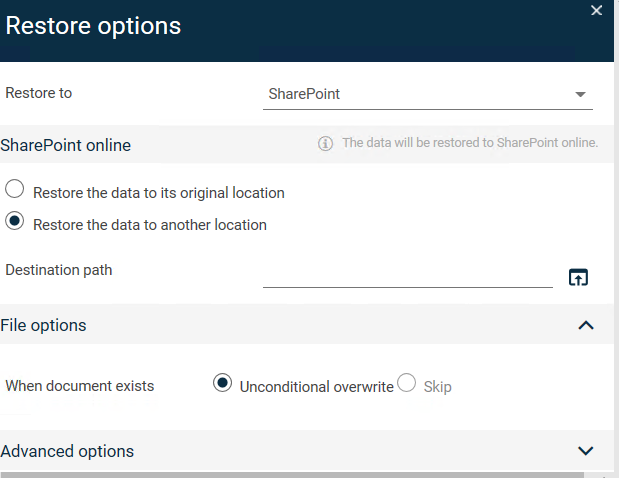
Step-7 Clicking on Restore Button will prompt for the type of restore options available:
For In Place Restore: Select this option Restore to original folder.
This will restore the selected content to the same/source location.

Note:
a) By default, if the restored document already exists on the destination, it will be skipped from the restore operation. However, you can optionally select any one of the following options:
Unconditional Overwrite: Select this option to overwrite the existing document with the document that has been restored. It is strongly recommended not to use the option unless specific requirement is there.
Append: Select this option to add a new version of the document in a version library. Example: In case there are three versions of a document and version two is deleted. During a restore selecting the append option and then selecting version two will add the version as version four at the end of the version sequence.
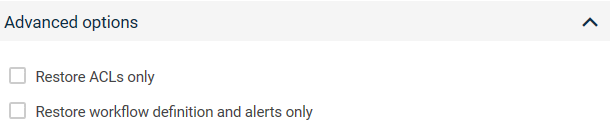
b) Restore ACLs only (only ACL information/permissions for the selected content is restored). No data gets restored if you select Restore ACL only.
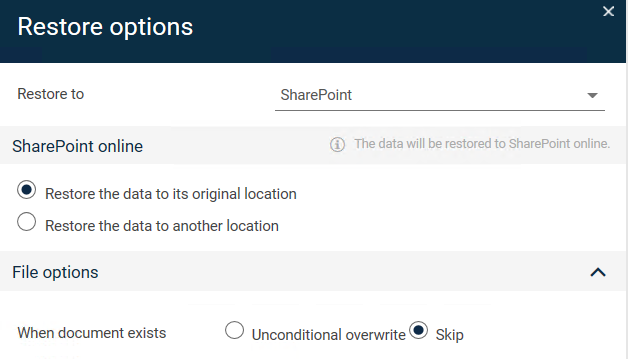
For Out of Place Restore: To perform an out-of-place restore operation, you can restore documents, lists, and libraries to a different path from where they were backed up.
Step-8 Clicking on Restore will initiate the process and status can be monitored by expanding the Jobs->Active Jobs in the Navigation Pane.